GalaxyNGのインストール
GalaxyNGを利用すると、オンプレミス環境に以下の機能をもつAutomation Hubを構築することができる。
- Community Galaxyが提供しているAnsibleのRoleやCollectionsのリポジトリ機能
- Quayのようなコンテナレジストリサイトが提供する、Execution Environmentのコンテナイメージのレジストリ機能
2022年4月現在のインストール方法を備忘録として残しておく。
環境
GalaxyNGのインストール
公式のガイドにしたがってインストールする。 <=できなかった。
まずはAnsible Coreのインストールから。インストールガイドの要件にAnsible 2.10+とあるので、Fedora35ではansible (2.9系)ではなくansible-core(2.12系)をdnfコマンドでインストールする。
$ sudo dnf install -y ansible-core
ansible-coreには、ansible.posixやcommunity.galaxyのようなCollectionは含まれないので、Collectionsは必要に応じてansible-galaxyコマンドでインストールする。
GalaxyNGの実体は、Pulpのプラグインなので、pulpをインストールするためのCollection(pulp_installer)を利用してインストールすることになる。そこで、あらかじめpulp_installerを利用したインストールに必要となる設定ファイルとPlaybook一式を用意しておいた。
Playbookの実行前に、pulp_installerと、それが依存しているRoleとCollectionをインストールしておくのを忘れずに。
$ git clone https://github.com/saito-hideki/galaxyng_installer
$ cd galaxyng_installer
$ ansible-galaxy collection install pulp.pulp_installer
$ ansible-galaxy install -r collections/ansible_collections/pulp/pulp_installer/requirements.yml
$ ansible-playbook -i hosts --extra-vars "@version.yml" --ask-become-pass install.yml
インストールに利用する各設定ファイルとPlaybookは、いまのところ以下の通り。version.ymlに設定しているプラグインは、それぞれ要求するpulpcoreバージョンが違うので、単純に最新版を...というインストールを行おうとすると失敗するので要注意。
- ansible.cfg
[defaults]
host_key_checking = False
collections_paths = ./collections
- hosts(FQDNを適切に変更する)
galaxyng.example.com ansible_connection=local
- install.yml(secret_keyとpulp_default_admin_passwordを適切に変更する)
---
- hosts: all
  force_handlers: True
  vars:
    pulp_settings:
      secret_key: changeme
      content_origin: "https://{{ inventory_hostname }}"
    pulp_default_admin_password: changeme
  roles:
    - pulp.pulp_installer.pulp_all_services
  environment:
    DJANGO_SETTINGS_MODULE: pulpcore.app.settings
- version.yml(2022/04現在で各プラグインのバージョン間でミスマッチがでない最新版を設定している)
---
pulpcore_version: 3.15.7
pulp_install_plugins:
  galaxy-ng:
    version: 4.4.3
  pulp-ansible:
    version: 0.10.3
  pulp-container:
    version: 2.8.6
いまのところ、公式ドキュメントのインストールガイドで提供されているPlaybookを利用するよりも、pulp_installerのドキュメントを参考に、各プラグインを適切にバージョン指定してインストールしたほうが良いという点に要注意。
GalaxyNGへのログイン
インストールが完了すると、Webブラウザから https://{{ inventory_hostname }}/ にアクセスすることで、ダッシュボードにログインして操作できるようになっているはず。

起動停止
GalaxyNGの起動・停止はsystemctlコマンドで実行できる。
$ sudo systemctl [start|stop|restart] pulpcore*
[macOS] minikubeのインストールとAWXのデプロイ
macOSのDocker Desktopを利用してminikubeを起動し、その上のawx-operatorを利用してAWXをデプロイする手順の備忘録。
環境
- HW: MacBook Pro(14"/2021)
- CPU: Apple M1 Max
- MEM: 32GB
- OS: macOS Monterey 12.2.1
- Docker: Docker Desktop 4.6.1 (76265)
- Kubernetes: minikube v1.25.2 (commit: 362d5fdc0a3dbee389b3d3f1034e8023e72bd3a7)
kubectlコマンドのインストール
まずはkubectlコマンドを公式ドキュメントにしたがってインストールする。m1のアーキテクチャはarm64なので、うっかり忘れてx86_64版をインストールしないこと。
minikubeをkubectlのaliasとして利用するという手もあるが、この手のやつはロクなことにならないので、クライアントコマンドくらいは普通にインストールしておく。
$ curl -LO "https://dl.k8s.io/release/$(curl -L -s https://dl.k8s.io/release/stable.txt)/bin/darwin/arm64/kubectl"
$ sudo install kubectl /usr/local/bin
$ kubectl version --client
Client Version: version.Info{Major:"1", Minor:"23", GitVersion:"v1.23.5", GitCommit:"c285e781331a3785a7f436042c65c5641ce8a9e9", GitTreeState:"clean", BuildDate:"2022-03-16T15:51:05Z", GoVersion:"go1.17.8", Compiler:"gc", Platform:"darwin/arm64"}
minikubeのインストール
Docker Desktopが提供してくれているKubernetes環境を利用しても良いが、ここではawx-operatorの公式ドキュメントでも紹介されることの多い、minikubeを利用してDocker Desktop & Kubernetesの環境を構築する。初心者が背伸びをすると大怪我するので無理はしない。これも忘れずarm64版をインストールする。
インストール手順は公式ドキュメントのminikube startにしたがう。
$ curl -LO https://storage.googleapis.com/minikube/releases/latest/minikube-darwin-arm64
$ sudo install minikube-darwin-arm64 /usr/local/bin/minikube
$ minikube version
minikube version: v1.25.2
commit: 362d5fdc0a3dbee389b3d3f1034e8023e72bd3a7
minikubeを起動
Docker Desktopに割り当てたメモリサイズにしたがって、minikubeを起動する。ingress-nginx-controllerを利用するので、あらかじめaddonsで指定しておく。minikubeのaddons設定は便利でよい。
$ minikube start --cpus=6 --memory=16g --addons=ingress
 minikube v1.25.2 on Darwin 12.2.1 (arm64)
 Automatically selected the docker driver
 Starting control plane node minikube in cluster minikube
 Pulling base image ...
 Creating docker container (CPUs=6, Memory=16384MB) ...
 Preparing Kubernetes v1.23.3 on Docker 20.10.12 ...
 ▪ kubelet.housekeeping-interval=5m
 ▪ Generating certificates and keys ...
 ▪ Booting up control plane ...
 ▪ Configuring RBAC rules ...
 Verifying Kubernetes components...
 After the addon is enabled, please run "minikube tunnel" and your ingress resources would be available at "127.0.0.1"
 ▪ Using image k8s.gcr.io/ingress-nginx/controller:v1.1.1
 ▪ Using image gcr.io/k8s-minikube/storage-provisioner:v5
 ▪ Using image k8s.gcr.io/ingress-nginx/kube-webhook-certgen:v1.1.1
 ▪ Using image k8s.gcr.io/ingress-nginx/kube-webhook-certgen:v1.1.1
 Verifying ingress addon...
 Enabled addons: storage-provisioner, default-storageclass, ingress
 Done! kubectl is now configured to use "minikube" cluster and "default" namespace by default

# minikubeのステータス確認
$ minikube status
minikube
type: Control Plane
host: Running
kubelet: Running
apiserver: Running
kubeconfig: Configured

# minikubeのIPアドレスを確認
$ minikube ip
192.168.49.2

# namespaceを確認(ingress-nginxが存在していること)
$ kubectl get namespace -A
NAME              STATUS   AGE
default           Active   8m10s
ingress-nginx     Active   8m8s
kube-node-lease   Active   8m12s
kube-public       Active   8m12s
kube-system       Active   8m12s

# podの起動状態を確認(ingress-nginx-controllerが起動していること)
kubectl get pods -A
NAMESPACE       NAME                                       READY   STATUS      RESTARTS        AGE
ingress-nginx   ingress-nginx-admission-create-nl49t       0/1     Completed   0               8m22s
ingress-nginx   ingress-nginx-admission-patch-hngwm        0/1     Completed   1               8m22s
ingress-nginx   ingress-nginx-controller-cc8496874-t6tlv   1/1     Running     0               8m22s
kube-system     coredns-64897985d-fmrc8                    1/1     Running     0               8m22s
kube-system     etcd-minikube                              1/1     Running     0               8m35s
kube-system     kube-apiserver-minikube                    1/1     Running     0               8m36s
kube-system     kube-controller-manager-minikube           1/1     Running     0               8m36s
kube-system     kube-proxy-6rd66                           1/1     Running     0               8m22s
kube-system     kube-scheduler-minikube                    1/1     Running     0               8m34s
kube-system     storage-provisioner                        1/1     Running     1 (8m21s ago)   8m34s
awx-operatorのデプロイ
upstreamのawx-operatorのリポジトリをcloneして、awx-operatorをデプロイする。現在(2022/03)は、make deployでおわり。namespaceはawxがデフォルトなので、変更したい場合はexport NAMESPACE=<ネームスペース>で環境変数を定義してから実行する。
$ git clone https://github.com/ansible/awx-operator.git
$ cd awx-operator
$ make deploy
namespace/awx created
customresourcedefinition.apiextensions.k8s.io/awxbackups.awx.ansible.com created
customresourcedefinition.apiextensions.k8s.io/awxrestores.awx.ansible.com created
customresourcedefinition.apiextensions.k8s.io/awxs.awx.ansible.com created
serviceaccount/awx-operator-controller-manager created
role.rbac.authorization.k8s.io/awx-operator-awx-manager-role created
role.rbac.authorization.k8s.io/awx-operator-leader-election-role created
clusterrole.rbac.authorization.k8s.io/awx-operator-metrics-reader created
clusterrole.rbac.authorization.k8s.io/awx-operator-proxy-role created
rolebinding.rbac.authorization.k8s.io/awx-operator-awx-manager-rolebinding created
rolebinding.rbac.authorization.k8s.io/awx-operator-leader-election-rolebinding created
clusterrolebinding.rbac.authorization.k8s.io/awx-operator-proxy-rolebinding created
configmap/awx-operator-awx-manager-config created
service/awx-operator-controller-manager-metrics-service created
deployment.apps/awx-operator-controller-manager created


# podが起動するまで見届ける
kubectl get pods -n awx -w
NAME                                               READY   STATUS              RESTARTS   AGE
awx-operator-controller-manager-86dc5b757b-m7ldr   0/2     ContainerCreating   0          50s
awx-operator-controller-manager-86dc5b757b-m7ldr   1/2     Running             0          68s
awx-operator-controller-manager-86dc5b757b-m7ldr   2/2     Running             0          80s
^C
AWXをデプロイする
公式サイトのmeloさんのデモを参考にしつつ、ingress-nginxを利用するようなawx-demo.ymlを作成する。
---
apiVersion: awx.ansible.com/v1beta1
kind: AWX
metadata:
  name: awx-demo
spec:
  service_type: ClusterIP
  ingress_type: ingress
  hostname: awx-demo.test.fgrep.org
awx-demo.ymlをnamespace:awxにapplyして、AWXをデプロイする。。各podがRunning状態となっても、DBマイグレーションなどの処理がバックグラウンドで動作しているので、サービスとして利用できるようになるには時間がかかる。
$ kubectl apply -f awx-demo.yml -n awx
awx.awx.ansible.com/awx-demo created

# デプロイが完了するのを待つ
$ kubectl get pods -n awx -w
NAME                                               READY   STATUS    RESTARTS   AGE
awx-operator-controller-manager-86dc5b757b-m7ldr   2/2     Running   0          9m40s
awx-demo-postgres-0                                0/1     Pending   0          0s
awx-demo-postgres-0                                0/1     Pending   0          0s
awx-demo-postgres-0                                0/1     Pending   0          1s
awx-demo-postgres-0                                0/1     Init:0/1   0          1s
awx-demo-postgres-0                                0/1     PodInitializing   0          14s
awx-demo-postgres-0                                1/1     Running           0          29s
awx-demo-766fffc8c8-rgvr9                          0/4     Pending           0          0s
awx-demo-766fffc8c8-rgvr9                          0/4     Pending           0          0s
awx-demo-766fffc8c8-rgvr9                          0/4     ContainerCreating   0          0s
awx-demo-766fffc8c8-rgvr9                          4/4     Running             0          51s

# serviceの確認
$ kubectl get service -n awx -o wide
NAME                                              TYPE        CLUSTER-IP      EXTERNAL-IP   PORT(S)    AGE   SELECTOR
awx-demo-postgres                                 ClusterIP   None            <none>        5432/TCP   18m   app.kubernetes.io/component=database,app.kubernetes.io/instance=postgres-awx-demo,app.kubernetes.io/managed-by=awx-operator,app.kubernetes.io/name=postgres,app.kubernetes.io/part-of=awx-demo
awx-demo-service                                  ClusterIP   10.104.107.15   <none>        80/TCP     17m   app.kubernetes.io/component=awx,app.kubernetes.io/managed-by=awx-operator,app.kubernetes.io/name=awx-demo
awx-operator-controller-manager-metrics-service   ClusterIP   10.102.81.112   <none>        8443/TCP   29m   control-plane=controller-manager

# ingress-nginxの確認
$ kubectl get ingress -n awx
NAME               CLASS   HOSTS                     ADDRESS        PORTS   AGE
awx-demo-ingress   nginx   awx-demo.test.fgrep.org   192.168.49.2   80      18m

# ダッシュボードのadminユーザのパスワードを確認
$ kubectl get secret awx-demo-admin-password -o jsonpath="{.data.password}" -n awx| base64 --decode
<YOUR_PASSWORD>
minikue tunnelでawx-demoのサービスにアクセス経路を作る。ダッシュボードへのトンネルを終了したければCTRL+C。
$ minikube tunnel
  Tunnel successfully started

  NOTE: Please do not close this terminal as this process must stay alive for the tunnel to be accessible ...

  The service/ingress awx-demo-ingress requires privileged ports to be exposed: [80 443]
  sudo permission will be asked for it.
  Starting tunnel for service awx-demo-ingress.
Password: ********
/etc/hostsにawx-test.test.fgrep.orgへのアクセスが127.0.0.1に向くようにエントリを追加する。
127.0.0.1 localhost awx-test.test.fgrep.org
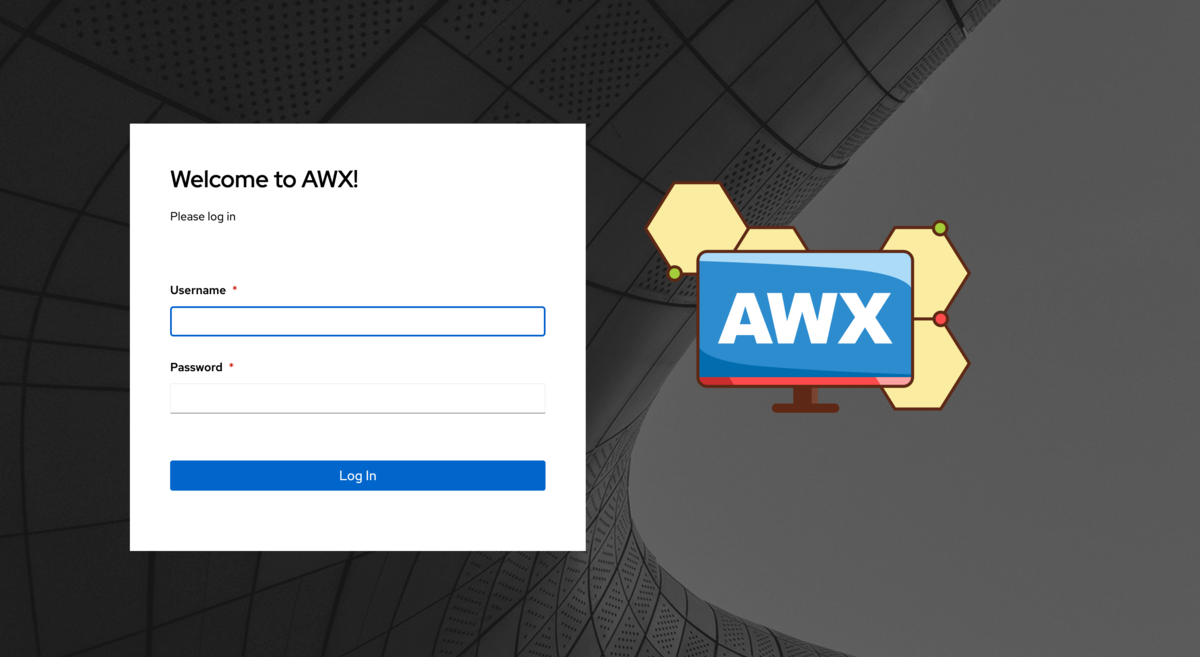
Webブラウザ経由でダッシュボードにアクセス
これで、母艦であるmacosからWebブラウザ経由でAWXのダッシュボードにアクセスして利用できる。テスト目的としては十分なはず。
Solaris11.4にPython3.9をインストールする
Ansible Collectionsのメンテナをやっていると、Solarisの面倒も見なければならないことがある。
現時点でのAnsibleのdevelブランチは、Python3.8以降のみをサポートしているが、どうもSolaris11では、公式に提供されているパッケージがないように見える。 そこで、しかたなくPython3.9をソースコードからビルドしてインストールしたので、その手順をメモしておく。もしかしたら、公式に提供されているパッケージが、この世にあるのかもしれない。
ちなみに、僕はSolarisが好きなので、自分がメンテナンスしているCollectionsでは、できる限りSolarisでも動作確認するようにしている。
環境
Python3.9のビルドとインストール
Linuxと違い、Solarisではビルドに必要なライブラリ群をあらかじめビルド&インストールしておく必要があることが多い。今回は、GNU grep最新のStable版(3.7)とlibffiの最新のStable版(3.7.4)のインストール程度で済んで幸運だった。
まずは、gccのインストールから。これは公式パッケージを利用するので、pkgコマンドでインストールする。
$ sudo pkg install gcc
$ gcc --version
gcc (GCC) 7.3.0
Copyright (C) 2017 Free Software Foundation, Inc.
This is free software; see the source for copying conditions.  There is NO
warranty; not even for MERCHANTABILITY or FITNESS FOR A PARTICULAR PURPOSE.
続いて、Python3.9.10のソースコードをダウンロードする。
$ mkdir work
$ cd work
~work$ wget https://www.python.org/ftp/python/3.9.10/Python-3.9.10.tgz
~work$ tar zxvf Python-3.9.10.tgz
~work$ cd Python-3.9.10
configureの過程で、grepコマンドの結果からax_cv_c_float_words_bigendianをセットしているようだが、Solaris11.4のgrepは古すぎるらしく、Python3.9.10のconfigureで失敗する。
~/work/Python-3.9.10$ ./configure
...ship...
checking for --with-libm=STRING... default LIBM="-lm"
checking for --with-libc=STRING... default LIBC=""
checking for x64 gcc inline assembler... yes
checking whether float word ordering is bigendian... unknown
configure: error:

Unknown float word ordering. You need to manually preset
ax_cv_c_float_words_bigendian=no (or yes) according to your system.
この問題を回避するために、GNU grep 3.7をダウンロードしてインストールしてビルド&インストール(/usr/local/bin/配下)して利用する。
~/work$ wget https://ftp.gnu.org/gnu/grep/grep-3.7.tar.xz --no-check-certificat
~/work$ gtar Jxvf grep-3.7.tar.xz
~/work$ cd grep-3.7
~/work/grep-3.7$ ./configure
~/work/grep-3.7$ make
~/work/grep-3.7$ sudo make install
~/work$ wget https://ftp.gnu.org/gnu/grep/grep-3.7.tar.xz --no-check-certificat
~/work$ gtar Jxvf grep-3.7.tar.xz
~/work$ cd grep-3.7
~/work/grep-3.7$ ./configure
~/work/grep-3.7$ make
~/work/grep-3.7$ sudo make install
さらにPythonのビルドに必要となるilibffiもビルド&インストール。なにもかも皆懐かしい。
~/work$ wget https://github.com/libffi/libffi/releases/download/v3.4.2/libffi-3.4.2.tar.gz
~/work$ tar zxvf libffi-3.4.2.tar.gz
~/work/libffi-3.4.2$ ./configure
~/work/libffi-3.4.2$ make
~/work/libffi-3.4.2$ sudo make install
/usr/local/bin/に優先的にPATHを通してPython3.9.10をビルド&インストール。
~/work/Python-3.9.10$ ./configure
~/work/Python-3.9.10$ make
~/work/Python-3.9.10$ sudo make install
~/work/Python-3.9.10$ python3.9 --version
Python 3.9.10
ansible_python_interpreterの設定も忘れずに
Ansible Core(ansible-playbookなどのコマンドラインツール)の実行時には、inventoryのvarsとして ansible_python_interpreter を明示的に指定し、Interpreter Discoveryでの検知漏れを抑止しておくのも忘れずに。
[testserver]
solaris


[testserver:vars]
ansible_user=testuser
ansible_python_interpreter=/usr/local/bin/python3

#
# EOF
#
ローカルストレージをKubernetesのPersistent Volumeとして追加する
AWXのように、Persistent Volumeを必要だったり、あったほうが都合が良いサービスを検証するために、Persistent Volumeをローカルストレージで提供する設定のメモ。
環境
- HW: MacBook Pro(14"/2021)
- CPU: Apple M1 Max
- MEM: 32GB
- OS: macOS Monterey 12.1
- Docker Desktop 4.4.2 (73305)
ローカルストレージにPersistent Volumeを作成する
Persistent Volumeの配置先となるディレクトリを作成する
ここでは、ローカルストレージにPersistent Volume用のディレクトリを5つ(pv0[0-4])作成する。macOSの/var/は/private/var/のシンボリックリンクなので、以降のパス指定では、実体である/private/var/を指定する。
$ for i in $(seq 0 4); do sudo mkdir -m 777 -p /private/var/lib/kubernetes/pv0$i; done
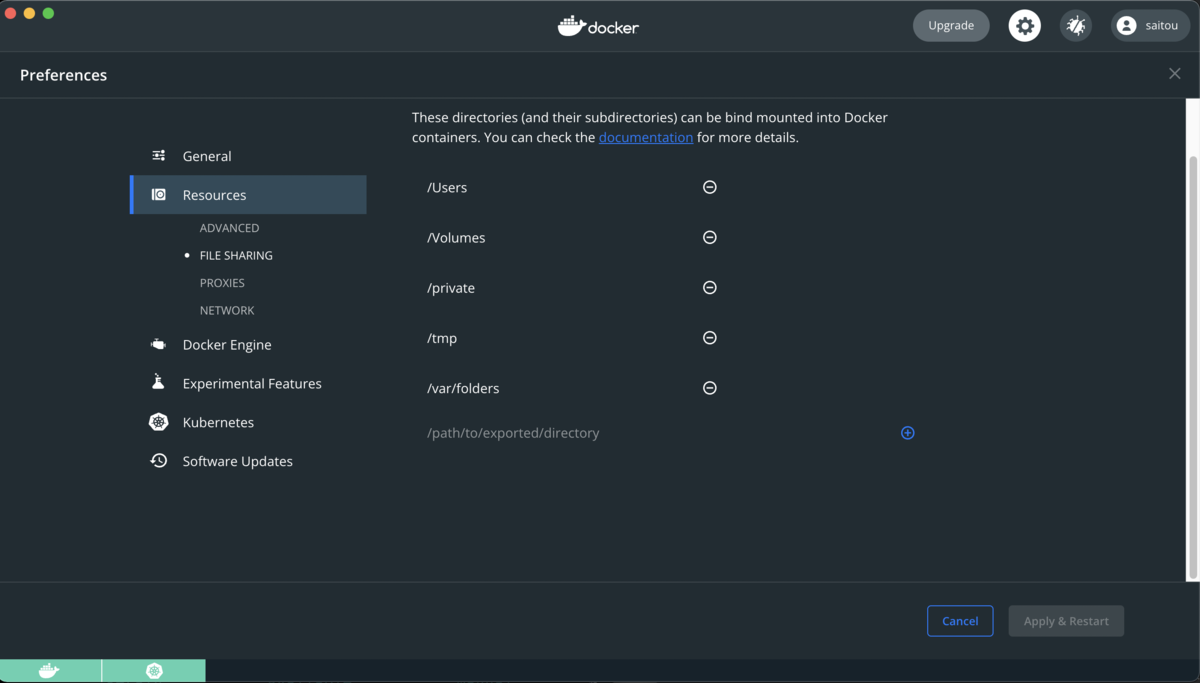
/private/配下は、Docker Desktop設定で母艦から共有可能なホワイトリストに入っているので、KubernetesのPersistent Volumeのパスとして指定できる。このホワイトリストに入っていないと、Kubernetes側にPersistent Volumeの設定を投入しても、コンテナからは見えないので注意。
Persistent Volumeを作成するためのYAMLファイルを作成する
公式ドキュメントのガイドをベースとして、ここではpv00に20GBを設定するYAMLファイル(create_persistent_volume.yaml)を作成する。
Docker Desktop上のKubernetesなので、ローカルホストからのみPersistent Volumeにアクセスできれば良い。そのため、accessModesはReadWriteOnceを設定しておく。
---
apiVersion: v1
kind: PersistentVolume
metadata:
  name: pv00
  labels:
    type: local
spec:
  storageClassName: manual
  capacity:
    storage: 20Gi
  accessModes:
    - ReadWriteOnce
  hostPath:
    path: "/private/var/lib/kubernetes/pv00"
Persistent Volume設定をapplyする
create_persistent_volume.ymlをapplyする。
$ kubectl apply -f create_persistent_volume.yaml
persistentvolume/pv00 created
pv00が追加されていることを確認する。
$ kubectl get pv
NAME   CAPACITY   ACCESS MODES   RECLAIM POLICY   STATUS      CLAIM   STORAGECLASS   REASON   AGE
pv00   20Gi       RWO            Retain           Available           manual                  11m

$ kubectl describe pv
Name:            pv00
Labels:          type=local
Annotations:     <none>
Finalizers:      [kubernetes.io/pv-protection]
StorageClass:    manual
Status:          Available
Claim:
Reclaim Policy:  Retain
Access Modes:    RWO
VolumeMode:      Filesystem
Capacity:        20Gi
Node Affinity:   <none>
Message:
Source:
    Type:          HostPath (bare host directory volume)
    Path:          /private/var/lib/kubernetes/pv00
    HostPathType:
Events:            <none>
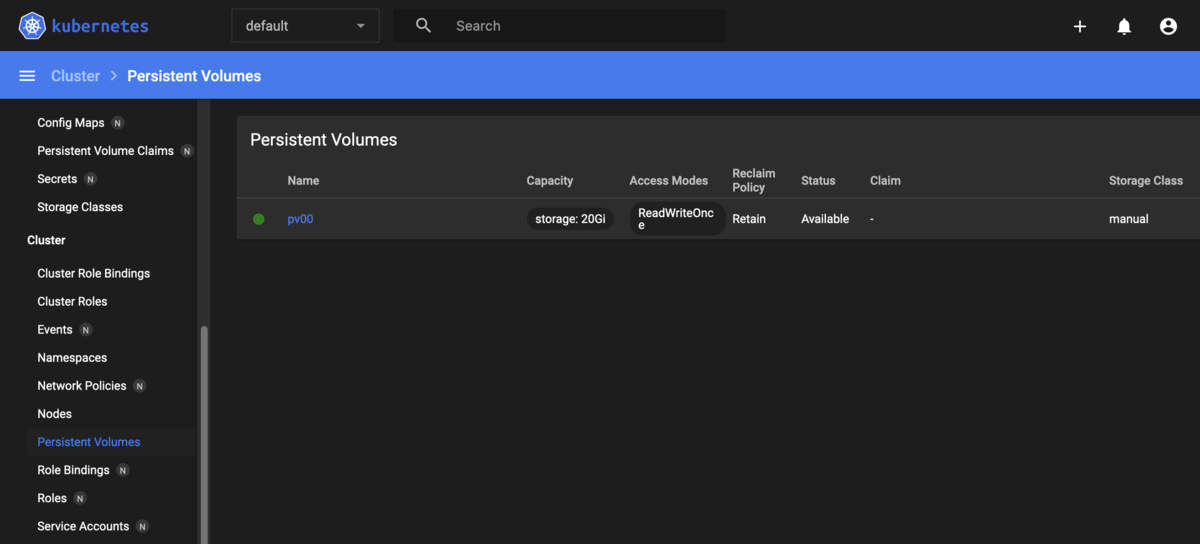
ダッシュボードからもpv00を確認できる。
create_persistent_volume.yamlをベースに、metadata.nameとspec.storageに、pv01からpv04を指定するようcreate_persistent_volume.ymlを修正することで、Persistent Volumeを必要に応じて順次追加できる。
Persistent Volumeのテスト
Persistent Volume Claimを作成する
テスト用にPersistent VolumeからPersistent Volume Claimを作成するYAMLファイル(create_persistent_volume_claim.yaml)してボリュームを払い出す。
ここでは、テスト目的でspec.volumeNameにPersistent Volume名を指定して、特定のPersistent Volumeから払い出しを行っている。
---
apiVersion: v1
kind: PersistentVolumeClaim
metadata:
  name: pv00-claim-0
spec:
  storageClassName: manual
  volumeName: pv00
  accessModes:
    - ReadWriteOnce
  resources:
    requests:
      storage: 1Gi
create_persistent_volume_claim.yamlをapplyしてボリュームを払い出す。applyがエラーなく完了したことを確認する。
$ kubectl apply -f create_persistent_volume_claim.yaml
persistentvolumeclaim/pv00-claim-0 created

$ kubectl get pvc
NAME           STATUS    VOLUME   CAPACITY   ACCESS MODES   STORAGECLASS   AGE
pv00-claim-0   Pending   pv00     0                         manual         25s

$ kubectl describe pvc pv00-claim-0
Name:          pv00-claim-0
Namespace:     default
StorageClass:  manual
Status:        Pending
Volume:        pv00
Labels:        <none>
Annotations:   <none>
Finalizers:    [kubernetes.io/pvc-protection]
Capacity:      0
Access Modes:
VolumeMode:    Filesystem
Used By:       <none>
Events:        <none>
Events:        <none>
Podを作成する
defaultネームスペースにテスト用のPodを作成し、Nginxコンテナを起動してボリュームをマウントしてテストする。
---
apiVersion: v1
kind: Pod
metadata:
  name: test-pod
spec:
  volumes:
    - name: test-volume
      persistentVolumeClaim:
        claimName: pv00-claim-0
  containers:
    - name: test-pod-container
      image: nginx
      ports:
        - containerPort: 80
          name: "http-server"
      volumeMounts:
        - mountPath: "/usr/share/nginx/html"
          name: test-volume
Pod(test-pod)が作成され、Nginxコンテナ(test-pod-container)が起動したことを確認する。
$ kubectl get pod test-pod
NAME       READY   STATUS    RESTARTS   AGE
test-pod   1/1     Running   0          113s

$ kubectl get pods -o='custom-columns=NameSpace:.metadata.namespace,NAME:.metadata.name,CONTAINERS:.spec.containers[*].name'
NameSpace   NAME       CONTAINERS
default     test-pod   test-pod-container
母艦側で、index.htmlを作成する。
$ echo 'Hello, World!' > /var/lib/kubernetes/pv00/index.html
test-pod-containerにアタッチして、母艦側で作成したindex.htmlがコンテナ側から参照できることを確認して終了。
$ kubectl exec -it test-pod -- /bin/bash
root@test-pod:/# curl http://127.0.0.1/index.html
Hello, World!
Persistent VolumeとPersistent Volume Claimが正しく動作するかどうかを確認するためには、おそらくこれで十分だと思う。
Docker DesktopでKubernetesを起動する
試しては忘れ、試しては忘れするmacOSのDocker DesktopでKubernetesを利用ための準備をメモしておく。
環境
- HW: MacBook Pro(14"/2021)
- CPU: Apple M1 Max
- MEM: 32GB
- OS: macOS Monterey 12.1
- Docker Desktop 4.4.2 (73305)
Docker DesktopでKubernetesを有効化
ダッシュボードから Kubernetes => Enable Kubernetes でk8sを有効化

kubectlのコンテキストをDocker Desktopに切り替え
$ kubectl config use-context docker-desktop
Dashbordを利用する
ダッシュボードのデプロイ
公式サイトのガイド(https://github.com/kubernetes/dashboard)にしたがって、Dashboardのデプロイする。
$ kubectl apply -f https://raw.githubusercontent.com/kubernetes/dashboard/v2.5.0/aio/deploy/recommended.yaml
サービスアカウントの作成
ここでも、公式サイトのガイド)にしたがって、サービスアカウント(admin)を作成し、cluster-adminロールを割り当てるためのYAMLファイル(create_service_account.yaml)を作成する。
---
apiVersion: v1
kind: ServiceAccount
metadata:
  name: admin
  namespace: kubernetes-dashboard
---
apiVersion: rbac.authorization.k8s.io/v1
kind: ClusterRoleBinding
metadata:
  name: admin
roleRef:
  apiGroup: rbac.authorization.k8s.io
  kind: ClusterRole
  name: cluster-admin
subjects:
- kind: ServiceAccount
  name: admin
  namespace: kubernetes-dashboard
create_service_account.yamlをapplyする。
$ kubectl apply -f create_service_account.yaml
DashboardにアクセスするためのBeaker Tokenを作成する。
$ kubectl -n kubernetes-dashboard get secret $(kubectl -n kubernetes-dashboard get sa/admin -o jsonpath="{.secrets[0].name}") -o go-template="{{.data.token | base64decode}}"
eyJhbGciOiJSUzI1NiIsImtpZCI6ImZtVWNQc2xBd09wVVpkUE5DY0ZKMUpZY2QxQjk2NEJ4bU1CaTdCc2pNXzQifQ.eyJpc3MiOiJrdWJlcm5ldGVzL3NlcnZpY2VhY2NvdW50Iiwia3ViZXJuZXRlcy5pby9zZXJ2aWNlY...snip...jqp1HStzf0GxWweRHUtrRI_RFtfr6K9EUc1a2GVNqMOVyNisJAKdI16AfoHZ7R0GpEEhSFRWNMlcz8Js_879wOFjz3OKOzkA02qLYFDaqq8YTn4eSpwP2NhLYu3a_UgV-WO7aTSDdKUWF5GSqAb3MEC9ZwWRtAHs6XBJbADQtQ
ローカルホスト経由でダッシュボードに接続するためのセキュアアクセスチャネルを作成して、ダッシュボードにアクセスする。
$ kubectl proxy
取得済のBeaker Tokenを利用して、ダッシュボードにアクセスする。

Dashboardを外部に公開する
kubernetes-dashboardのネームスペースとサービス名を確認する。
$ kubectl get services --all-namespaces | grep dashboard
kubernetes-dashboard   dashboard-metrics-scraper   ClusterIP   10.103.230.46    <none>        8000/TCP                 51m
kubernetes-dashboard   kubernetes-dashboard        ClusterIP   10.108.201.209   <none>        443/TCP                  51m
サービス(kubernetes-dashboard)の設定を修正し、NodePortで外部に向けてサービスを提供できるよう修正する。
※nodePortのレンジは30000-32767なので注意。
$ kubectl get service kubernetes-dashboard -n kubernetes-dashboard -o yaml > custom_dashboard.yaml
$ vi custom_dashboard.yaml
...snip...
spec:
  clusterIP: 10.108.201.209
  clusterIPs:
  - 10.108.201.209
  internalTrafficPolicy: Cluster
  ipFamilies:
  - IPv4
  ipFamilyPolicy: SingleStack
  ports:
  - port: 443
    protocol: TCP
    targetPort: 8443
    nodePort: 30443         # nodePortを追加
  selector:
    k8s-app: kubernetes-dashboard
  sessionAffinity: None
  type: NodePort            # NodePortに変更
...snip
修正したcustom_dashboard.yamlをapplyしてダッシュボードの設定変更を反映させる。
$ kubectl apply -f custom_dashboard.yaml
これで、k8sのダッシュボードを起動しているノードに、HTTPSでポート:30443にアクセスすることで、ダッシュボードを利用できる。
- https:/test.example.com:30443/

Custom Execution Environmentを作成する
Ansible Builderを利用して、任意のZバージョン(X.Y.Z)のAnsible Coreを含むExecution Environmentイメージを作成する方法をメモしておく。
環境
Execution Environmentを、Fedora35の上でpodmanを利用してビルドする:
$ sudo lsb_release -a
LSB Version:    :core-4.1-amd64:core-4.1-noarch
Distributor ID: Fedora
Description:    Fedora release 35 (Thirty Five)
Release:    35
Codename:   ThirtyFive

$ podman -v
podman version 3.4.4
Ansible Builderのインストール
virtualenvとpipを利用して、ビルド環境を構築する:
$ mkdir work && cd work
$ python3.9 -m venv venv
$ source venv/bin/activate
virtualenvをアクティベートしてAnsible Builderをインストールする:
(venv) $ pip install -U pip
(venv) $ pip install ansible-builder
(venv) $ ansible-builder --version
1.0.1
作業用ディレクトリ(ee)を作成する:
(venv) $ mkdir ee && cd ee
ビルドファイルの作成
Ansible Builderを利用して、Execution Environmentのビルドするために必要な設定ファイル群を、公式サイトにしたがって作成する。
ディレクトリ構成
(venv) $ tree .

.
├── ansible.cfg
├── bindep.txt
├── ee.yml
├── requirements.txt
└── requirements.yml
ee.yml
(venv) $ cat ee.yml

---
version: 1

build_arg_defaults:
  EE_BASE_IMAGE: 'quay.io/ansible/ansible-runner:stable-2.12-devel'  #[1]

ansible_config: 'ansible.cfg'  #[2]

dependencies:
  galaxy: requirements.yml  #[3]
  python: requirements.txt  #[4]
  system: bindep.txt        #[5]

additional_build_steps:     #[6]
  prepend: |
    RUN whoami
    RUN cat /etc/os-release
  append:
    - RUN echo This is a post-install command!
    - RUN ls -la /etc
[1] quay.ioにあるベースイメージ(ansible-runner)のパスを指定する
- Ansible Core 2.11の場合はquay.io/ansible/ansible-runner:stable-2.12-devel
- Ansible Core 2.12の場合はquay.io/ansible/ansible-runner:stable-2.11-devel
[2] ansible.cfgのパスを指定する
[3]のrequirements.ymlで指定したcollectionsをansible-galaxyコマンドでダウンロードする際に利用する。Community Galaxy経由ではなく、独自にPrivate Automation HubやGalaxy NGからCollectionsのコンテンツを提供している場合は、URLやTOKENなどの接続情報を指定することができる。
(venv) $ cat ansible.cfg

[galaxy]
#server_list = automation_hub

[galaxy_server.automation_hub]
#url=https://cloud.redhat.com/api/automation-hub/
#auth_url=https://sso.redhat.com/auth/realms/redhat-external/protocol/openid-connect/token
#token=my_ah_token
[3] requirements.ymlのパスを指定する
Execution Environmentビルド時にダウンロードしておくCollectionsを、requirements.ymlに指定する。
ansible.posixやcommunity.generalなどのAnsible Releaseに含まれるCollectionsは、[4]でインストールするAnsibleに含まれるので、ここでは除外している。
$ cat requirements.yml

collections:
  - awx.awx
[4] requirements.ymlのパスを指定する
- Execution Environmentにダウンロードして利用するAnsible CoreとAnsibleのバージョンを指定する。
- [3]でダウンロードするCollectionsが必要とするPythonモジュール(botoなど)は、requirements.txtを設定する。
(venv) $ cat requirements.txt

ansible-core == 2.12.1  # Playbookの実行に利用したいAnsible Coreのバージョンを指定する
ansible == 5.1.0
awxkit  # for awx.awx collections
python-dateutil >= 2.7.0  # for awx.awx.collections
pytz  # for awx.awx collections
[5] bindep.txtのパスを指定する
Execution EnvironmentとなるコンテナイメージにインストールしたいOSパッケージの情報を指定する。
$ cat bindep.txt

tree [platform:rpm]
[6] ビルドプロセスの前後で実行するスクリプトを指定する
- additional_build_steps.prepend - ビルドプロセス前に実行するスクリプト
- additional_build_steps.append - ビルドプロセス後に実行するスクリプト
Execution Environmentのビルド
ansible-builderコマンドでExecution Environmentをビルドする:
(venv) $ ansible-builder build --tag=ee-ansible-v5:5.1.0 --file=./ee.yml

Running command:
  podman build -f context/Containerfile -t ee-ansible-v5:5.1.0 context
Complete! The build context can be found at: /home/hsaito/tmp/work/ee/context
できあがり:
(venv) $ podman images

REPOSITORY                       TAG                IMAGE ID      CREATED        SIZE
localhost/ee-ansible-v5          5.1.0              7792250bce14  2 minutes ago  1.33 GB
<none>                           <none>             1244d8886eff  3 minutes ago  1.24 GB
<none>                           <none>             7930ca783be2  6 minutes ago  764 MB
quay.io/ansible/ansible-runner   stable-2.12-devel  38fd0ce19a5c  12 hours ago   763 MB
quay.io/ansible/ansible-builder  latest             3e9c9e0198dc  12 hours ago   655 MB
git-secretsを利用したAWSキーの漏洩対策
git-secretsを利用して、AWSのアクセス/シークレットキーを、意図せずGitリポジトリに公開しないよう対策する。既に多くの利用例が紹介されているが、備忘録としてインストールと利用方法をメモしておく。
git-secretsのインストール
macOS
Homebrewを利用してインストール:
$ brew install git-secrets
$ which git-secrets
/opt/homebrew/bin/git-secrets
Linux
公式リポジトリをgit cloneしてインストール:
$ git clone https://github.com/awslabs/git-secrets
$ cd git-secrets
$ sudo make install
$ which git-secrets
/usr/local/bin/git-secrets
git-secretsを適用する
デモ用のプロジェクトにgit-secretsを適用する:
$ git clone git@github.com:saito-hideki/demo-ansible-project.git
$ cd demo-ansible-project
$ git secrets --install
✓ Installed commit-msg hook to .git/hooks/commit-msg
✓ Installed pre-commit hook to .git/hooks/pre-commit
✓ Installed prepare-commit-msg hook to .git/hooks/prepare-commit-msg
gitプロジェクトレベルでAWSのアクセスキーとシークレットキーの漏洩対策の設定:
$ git secrets --register-aws
OK
globalレベルでのSAWSのアクセスキーとシークレットキーの漏洩対策の設定:
$ git secrets --register-aws --global
設定を実施すると、そ以下のパスにある設定ファイルの[secrets]セクションが追加され、git secrets scanや、git commit時にスキャンするパターン(patterns)が`[secrets]セクションに設定される。
- プロジェクトレベルで設定した場合は、gitのプロジェクトディレクトリの
.git/config - globalレベルで設定した場合は`$HOME/.gitconfig
...
[secrets]
        providers = git secrets --aws-provider
        patterns = (A3T[A-Z0-9]|AKIA|AGPA|AIDA|AROA|AIPA|ANPA|ANVA|ASIA)[A-Z0-9]{16}
        patterns = (\"|')?(AWS|aws|Aws)?_?(SECRET|secret|Secret)?_?(ACCESS|access|Access)?_?(KEY|key|Key)(\"|')?\\s*(:|=>|=)\\s*(\"|')?[A-Za-z0-9/\\+=]{40}(\"|')?
        patterns = (\"|')?(AWS|aws|Aws)?_?(ACCOUNT|account|Account)_?(ID|id|Id)?(\"|')?\\s*(:|=>|=)\\s*(\"|')?[0-9]{4}\\-?[0-9]{4}\\-?[0-9]{4}(\"|')?
        allowed = <サンプルアクセスキー>
        allowed = <サンプルシークレットキー>
git-secretsの効果を確認する
AWSのアクセスキーは、AKIAから始まり16文字の[A-Z0-9]で構成されているので、サンプルデータを作成して効果を確認する。
[secrets]に定義されたpatternsにしたがってgit commit時にスキャンされる:
※allowedに記載された文字列については除外される:
$ echo "AWS_ACCESS_KEY = AKIA`openssl rand -hex 128 | cut -c 1-16 | tr \[:lower:\] \[:upper:\]`" > hello.txt
$ git commit -a
hello.txt:1:AWS_ACCESS_KEY = <アクセスキー>

[ERROR] Matched one or more prohibited patterns

Possible mitigations:
- Mark false positives as allowed using: git config --add secrets.allowed ...
- Mark false positives as allowed by adding regular expressions to .gitallowed at repository's root directory
- List your configured patterns: git config --get-all secrets.patterns
- List your configured allowed patterns: git config --get-all secrets.allowed
- List your configured allowed patterns in .gitallowed at repository's root directory
- Use --no-verify if this is a one-time false positive
既存のコンテンツに含まれているかどうかは、--scan-historyで確認できる:
$ git secrets --scan-history
<コミットID>:hello.txt:1:AWS_ACCESS_KEY = <アクセスキー>

[ERROR] Matched one or more prohibited patterns

Possible mitigations:
- Mark false positives as allowed using: git config --add secrets.allowed ...
- Mark false positives as allowed by adding regular expressions to .gitallowed at repository's root directory
- List your configured patterns: git config --get-all secrets.patterns
- List your configured allowed patterns: git config --get-all secrets.allowed
- List your configured allowed patterns in .gitallowed at repository's root directory
- Use --no-verify if this is a one-time false positive
[secrets]セクションでのチェックを無視してcommitする場合は、--no-verifyオプションを付与する:
$ git commit --no-verify